I recently ventured into territory that was thus far unchartered for me: mobile development. As my evening schedule became less and less pre-occupied with post-work work in support of the PyTorch 1.0 release, I noticed pockets of time I wanted to fill with an interesting side project that would teach me something new. The exact details of this project aren’t relevant to this post, but in short, it was an iOS app written in Swift that involved detecting bounding boxes for text in images. Since you asked, those images would usually contain food menus – of course, all my activities are usually in pursuit of or related to food.
As I concocted a plan of attack for this project I was faced with three major design decisions: what platform to target (iOS, Android or both); what framework to use (Swift/Java or React Native) and lastly whether to train my own machine learning algorithm and ship it to the device, or call into an off-the-shelf cloud API. Since all my devices have Apple logos on them the first was an easy choice. The second I pondered over for a little longer. I had wanted to learn Swift for some time, having heard much praise and much criticism of this relatively new language, and wanted to compare it to Rust and other new-ish languages. On the other hand, React Native sounded very exciting too, being an immensely popular framework developed by my “home team”, Facebook. I ultimately settled on Swift for the reasons I mentioned, and I think that was a fine decision. The last discussion point warranted more intensive investigation. I spent some time reviewing the latest literature and state-of-the-art in object character recognition (OCR) and while I did settle on a particular model and had my GPUs all warmed up and ready to flip some FLOPs, I finally decided that using the Google Cloud Vision API would save me a couple weeks of work with perfectly acceptable results. Their free tier also sufficiently covered my needs, so I called it a day and conceded that Google knows a thing or two about OCR too.
Now that you have all the background you were never interested in, let’s move on to the technical part of this post. I’ll begin by discussing the Google Cloud Vision API with a particular focus on OCR and show how to interact with it purely via cURL and the command line as an appetizer. I’ll then walk you through setting up photo capture in a basic Swift app, sending captured images to Google’s clouds and displaying the recognized text and bounding boxes that rain back down.
Using the Google Cloud Vision API
The Google Cloud Vision API is a set of API endpoints that provide various forms of image analysis as a service. Given an image, you can ask for the class of the object to be recognized, for reverse image search results, for unsafe content detection (e.g. nudity or violence) and – relevant to our use case – text recognition. What is convenient about the latter service is that it actually provides two kinds of results in one: you get bounding box coordinates of any text “groupings” (words, sentences, paragraphs) as well as the recognized text within each bounding box. This means you can display visual markers for each bounding box and then perform some action based on the detected text when a user interacts with a certain bounding box. This OCR service is free up to 1000 API calls per month at the time of this writing. Refer to the full pricing information to see where the price goes from there (it’s reasonable).
Allow me to leave you to the official guides on setting up Google Cloud and enabling the API. When you come back, you want to be in a position where the following command (taken from here) gives you a successful response:
$ curl -X POST \
     -H "Authorization: Bearer "$(gcloud auth application-default print-access-token) \
     -H "Content-Type: application/json; charset=utf-8" \
     --data "{
      'requests': [
        {
          'image': {
            'source': {
              'imageUri': 'gs://bucket-name-123/abbey_road.jpg'
            }
          },
          'features': [
            {
              'type': 'TEXT_DETECTION'
            }
          ]
        }
      ]
    }" "https://vision.googleapis.com/v1/images:annotate"
Let’s bisect the structure of this request a bit, since we’ll be sending similar ones in our app
later on. The request itself is an object, with a single key requests whose value is one or more
API requests in a list. Each request in turn contains an image, and specifies one or more services
we request for this image. The image can be supplied in various forms. Above, we specify a URI
pointing at a Google Cloud storage bucket. In our application, we’ll instead be embedding the entire
image as a base64 encoded string. One noteworthy detail about the features we request to be analyzed
is that we could swap TEXT_DETECTION for DOCUMENT_TEXT_DETECTION. TEXT_DETECTION uses a model
more optimized for text “in the wild”, such as street signs or food menus. DOCUMENT_TEXT_DETECTION
instead provides better results for very dense text as found in documents such as pages of a book.
Lastly, the API endpoint we target with this request is images:annotate to access the OCR service,
which we append to https://vision.googleapis.com/v1 to form the complete URL.
The full JSON response from the above cURL command is quite a lot to digest. To get a more succinct
overview, let’s beam up the following image (download it and save it to disk as test-image.png):

We’ll now employ the alternative mechanism of supplying the image payload: embedding a base64
encoded string of the image data. Unix systems conveniently have a base64 command into which we
can simply pipe the image to get the encoded string. We can even embed this into the cURL command:
$ curl -X POST \
     -H "Authorization: Bearer "$(gcloud auth application-default print-access-token) \
     -H "Content-Type: application/json; charset=utf-8" \
     --data "{
      'requests': [
        {
          'image': {
            'content': '$(cat test-image.png | base64)'
          },
          'features': [
            {
              'type': 'TEXT_DETECTION'
            }
          ]
        }
      ]
    }" "https://vision.googleapis.com/v1/images:annotate"
The response should look largely like the one below. I’ve omitted the fullTextAnnotation object
which has very fine grained annotations, down to individual characters. We’re more interested in the
textAnnotations objet, which provides annotations at the level of sentences and words:
{
  "responses": [{
    "textAnnotations": [{
        "locale": "en",
        "description": "Optical Character Recognition\n",
        "boundingPoly": {
          "vertices": [{
              "x": 5,
              "y": 18
            },
            {
              "x": 372,
              "y": 18
            },
            {
              "x": 372,
              "y": 44
            },
            {
              "x": 5,
              "y": 44
            }
          ]
        }
      },
      {
        "description": "Optical",
        "boundingPoly": {
          "vertices": [{
              "x": 5,
              "y": 18
            },
            {
              "x": 88,
              "y": 18
            },
            {
              "x": 88,
              "y": 44
            },
            {
              "x": 5,
              "y": 44
            }
          ]
        }
      },
      {
        "description": "Character",
        "boundingPoly": {
          "vertices": [{
              "x": 99,
              "y": 18
            },
            {
              "x": 218,
              "y": 18
            },
            {
              "x": 218,
              "y": 38
            },
            {
              "x": 99,
              "y": 38
            }
          ]
        }
      },
      {
        "description": "Recognition",
        "boundingPoly": {
          "vertices": [{
              "x": 227,
              "y": 19
            },
            {
              "x": 372,
              "y": 19
            },
            {
              "x": 372,
              "y": 44
            },
            {
              "x": 227,
              "y": 44
            }
          ]
        }
      }
    ],
    "fullTextAnnotation": {}
  }]
}
The textAnnotations section contains a list of objects for each detected sentence and word. In
each object, the description contains the recognized text and the boundingPoly describes a
polygon that encloses this text. The coordinates of this polygon are in pixels relative to the
origin (top left corner) of the image. When possible, the service will also return a locale to
indicate the language it believes the text to be. And that’s all there is to the response really,
although you can inspect the documentation for
AnnotateImageResponse
to get the full picture (without bounding boxes – ha). We’ll dive into developing the app next.
Building the Swift iOS Application
The next few paragraphs explore setting up a basic iOS app in Swift that has the ability to capture photos using the phone’s camera. Subsequently we will discuss making the API calls we just studied from within our app. The last step is to display the bounding boxes on the captured image. I’ll also hint at how to perform actions based on interactions with bounding boxes and their associated text.
The full code for this tutorial can be found in this repository if you want to follow along.
A Basic App
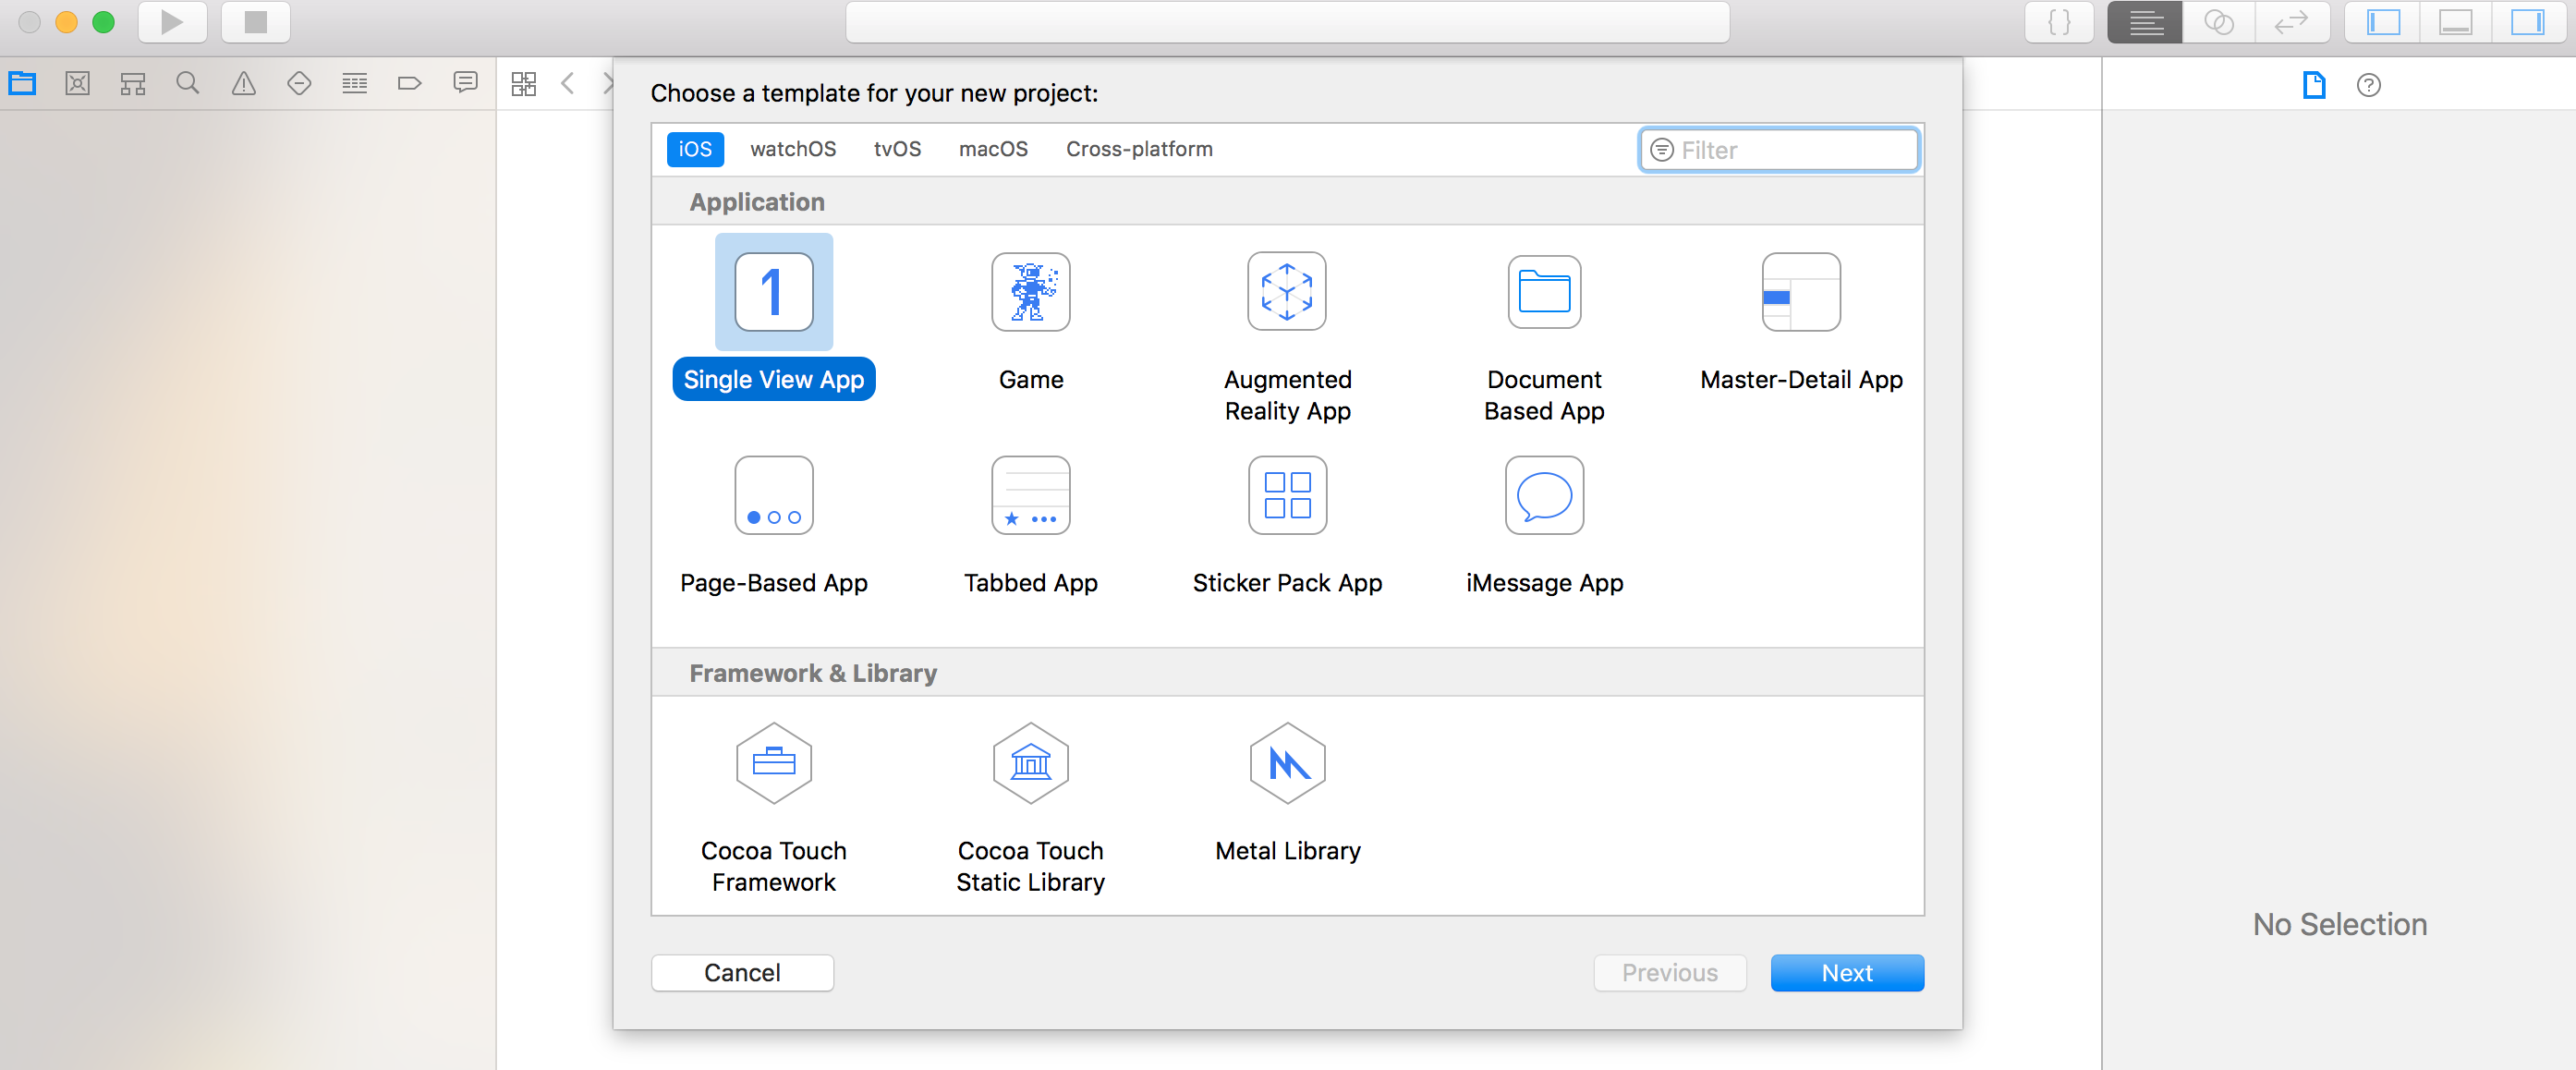
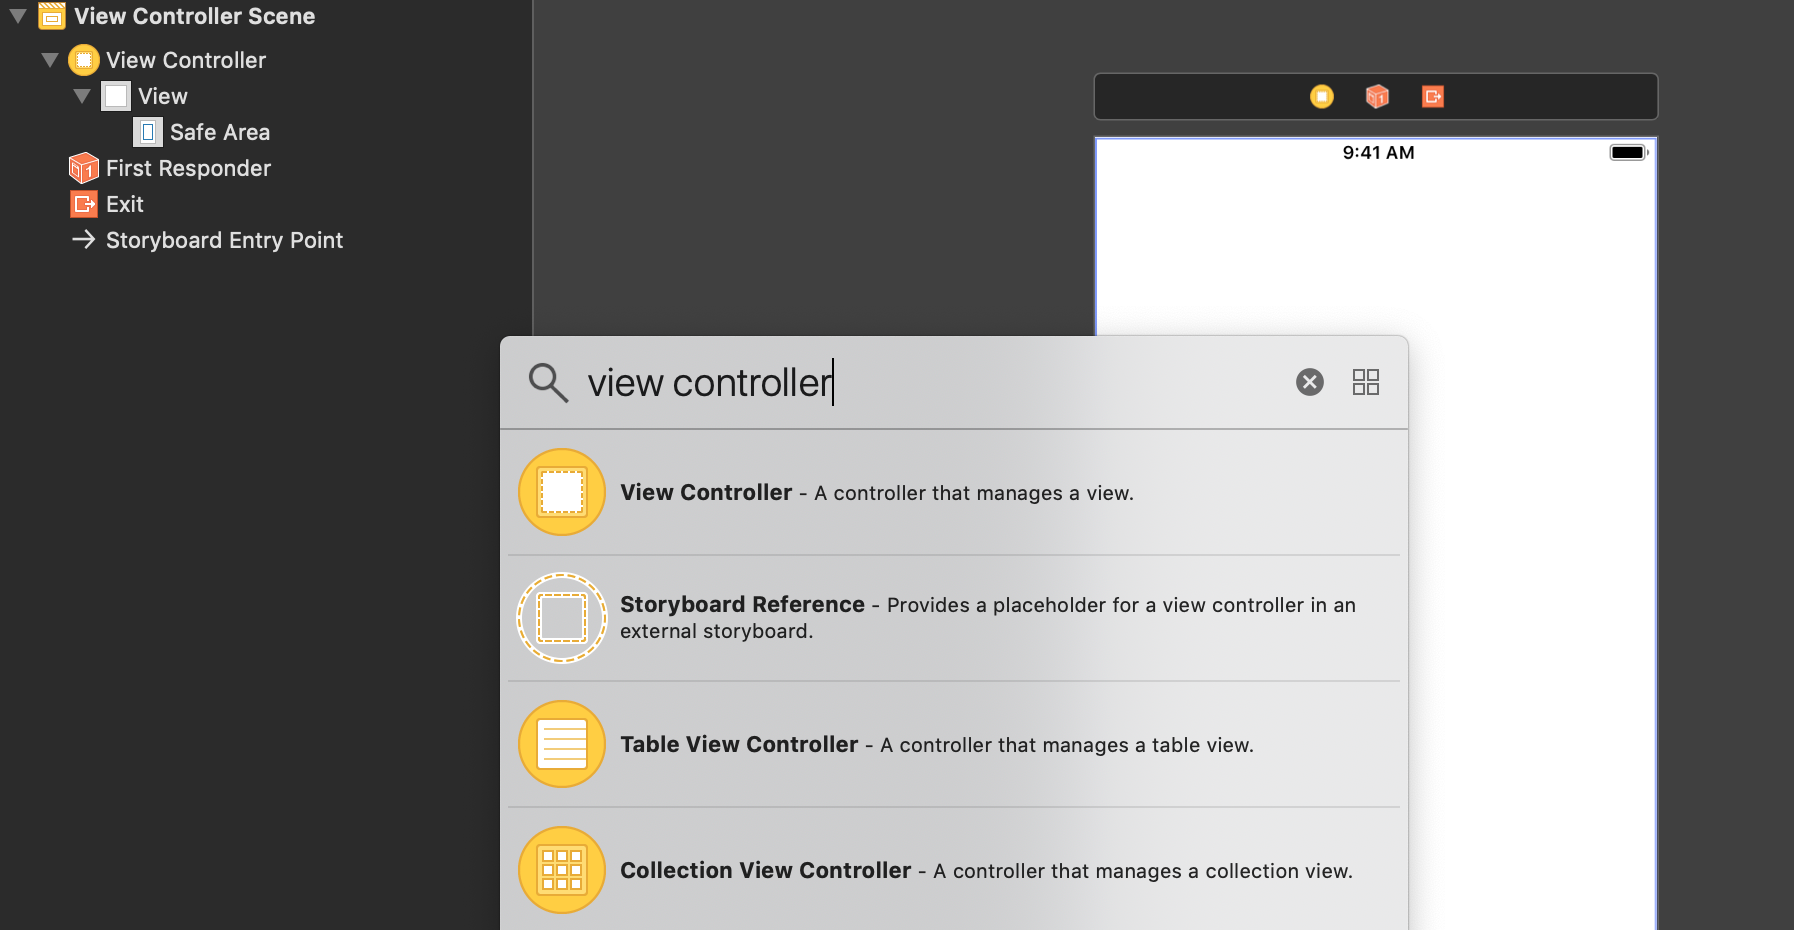
I assume you have some (minimal) prior experience with developing iOS apps with Swift and XCode, so I won’t cover the basic basics. If either of these are new to you, I found the Swift language guide and official tutorial on iOS development pretty good to get started. Let’s start by creating a new single view app project in XCode:
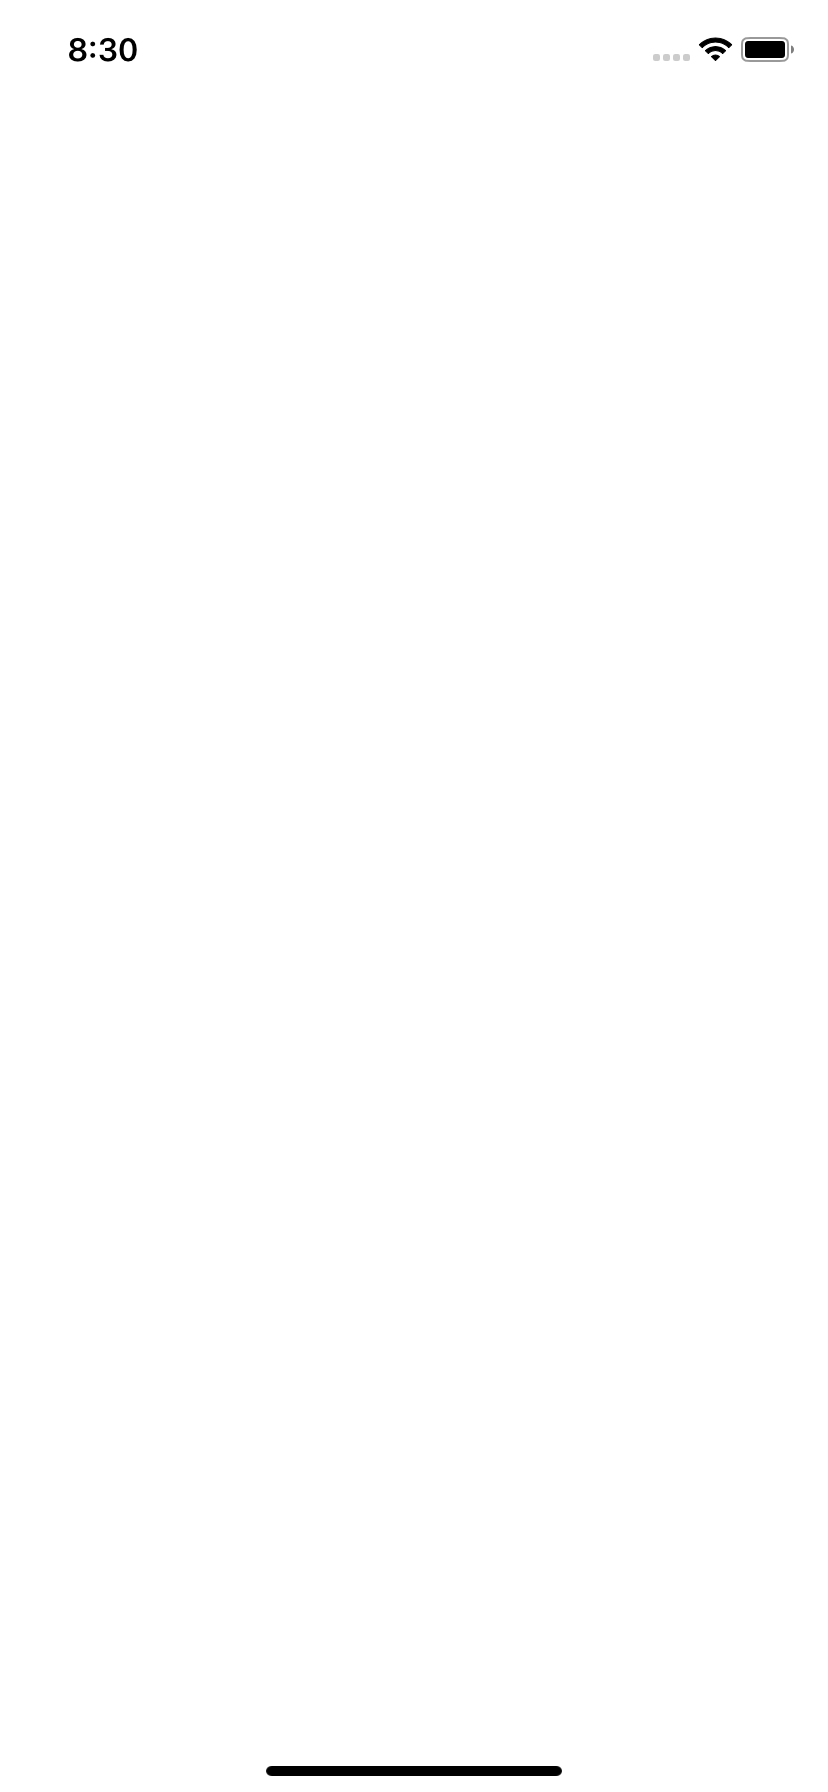
I chose GoogleCloudVisionOCRExample as the name for my project. Building the app and running it in
the Simulator should present you with a beautiful white screen filled with blissful nothingness:
Setting Up Basic Image Capture
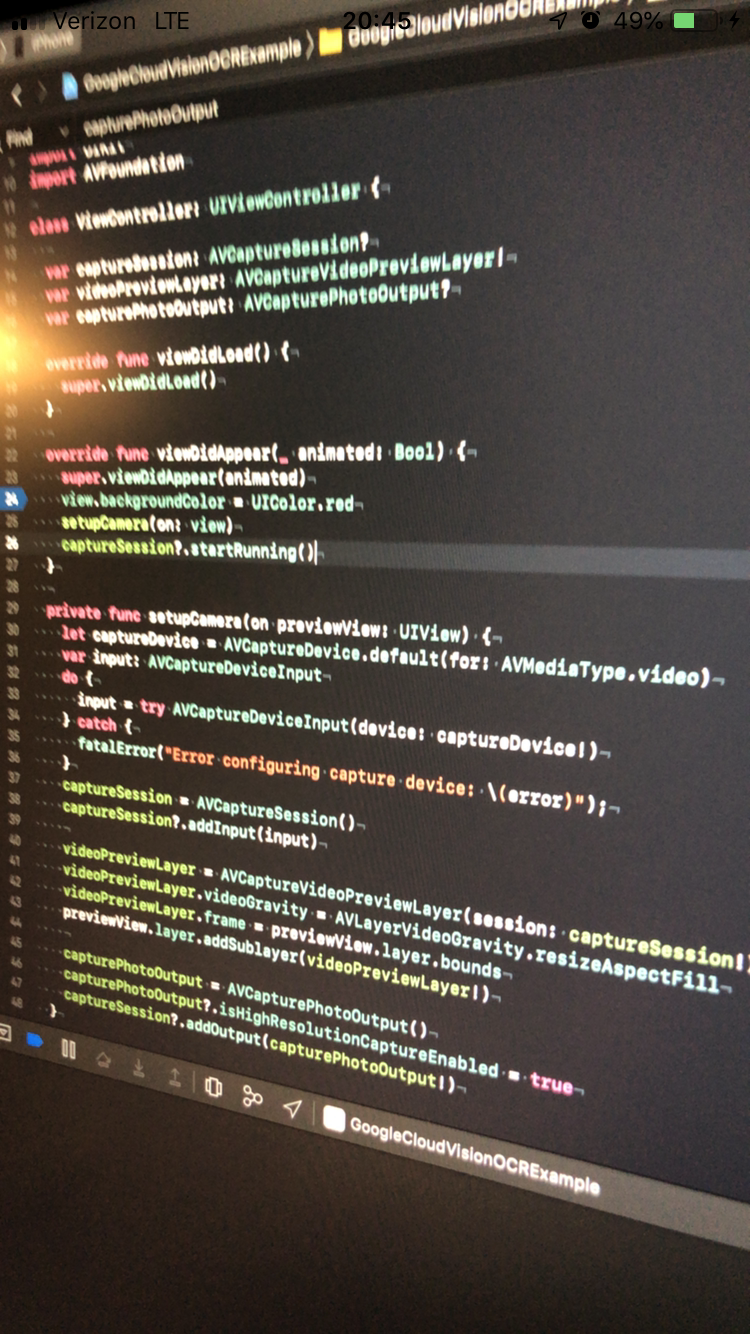
Let’s continue by changing our most bare ViewController.swift to import AVFoundation, the kit
that exposes the relevant photo capture interface. We’ll begin by setting up a live photo preview in
our main ViewController. To reduce the number of screenshots in this post, I’ll do most of this
programatically. You can naturally use the InterfaceBuilder and connect the apropriate outlets to
the ViewController if you prefer a more visual approach. Also note that the XCode iOS simulator
does not have a camera, so you will need to connect a physical phone from here on. The
ViewController.swift that comes with the empty app should be populated as follows:
import UIKit
import AVFoundation

class ViewController: UIViewController {

  var captureSession: AVCaptureSession!

  override func viewDidLoad() {
    super.viewDidLoad()
    setupCamera()
  }

  override func viewDidAppear(_ animated: Bool) {
    super.viewDidAppear(animated)
    captureSession.startRunning()
  }

  override func viewWillDisappear(_ animated: Bool) {
    captureSession.stopRunning()
  }

  private func setupCamera() {
    let captureDevice = AVCaptureDevice.default(for: AVMediaType.video)
    var input: AVCaptureDeviceInput
    do {
      input = try AVCaptureDeviceInput(device: captureDevice!)
    } catch {
      fatalError("Error configuring capture device: \(error)");
    }
    captureSession = AVCaptureSession()
    captureSession.addInput(input)

    // Setup the preview view.
    let videoPreviewLayer = AVCaptureVideoPreviewLayer(session: captureSession)
    videoPreviewLayer.videoGravity = AVLayerVideoGravity.resizeAspectFill
    videoPreviewLayer.frame = view.layer.bounds
    view.layer.addSublayer(videoPreviewLayer)
  }
}
We first declare an AVCaptureSession that allows starting and stopping the video preview layer
displayed in the app. Upon viewDidLoad() we call setupCamera(), where we initialize this capture
session by supplying it an appropriate AVCaptureDevice, configured for video (or photo) input.
We also add a preview layer to our main view. When the viewDidAppear() we start the capture
session and stop it again in viewWillDisappear() if the view were to segue to a
different view controller.
Before we can run the app properly, we need to edit our Info.plist file to
enable permissions for accessing the camera device. Add a line like this:

If you now run the application, you should see a live preview of whatever the camera on your phone currently captures:
Next, we need to setup the flow for taking a picture. For this, we’ll add a
UITapGestureRecognizer to our ViewController. We can connect this tap
gesture recognizer to a custom handler function, inside which we’ll snap a
picture and process it further:
class ViewController: UIViewController {

  var captureSession: AVCaptureSession!
  var tapRecognizer: UITapGestureRecognizer! // NEW

  override func viewDidLoad() {
    super.viewDidLoad()
    setupCamera()
    setupTapRecognizer() // NEW
  }

  private func setupTapRecognizer() {
    tapRecognizer = UITapGestureRecognizer(target: self, action: #selector(handleTap))
    tapRecognizer?.numberOfTapsRequired = 1
    tapRecognizer?.numberOfTouchesRequired = 1
    view.addGestureRecognizer(tapRecognizer!)
  }

  @objc func handleTap(sender: UITapGestureRecognizer) {
    if sender.state == .ended {
      print("Tap!")
    }
  }
If you now run the app and tap on the screen once the live preview shows up, you
should see friendly "Tap!" exclamations in the XCode output terminal. Let’s
continue by acting on these taps beyond just printing a message in the terminal.
We need to add a new AVCapturePhotoOutput property to our ViewController and
a method to initialize this object, which we call in viewDidLoad() after
setupCamera():
class ViewController: UIViewController {

  var captureSession: AVCaptureSession!
  var tapRecognizer: UITapGestureRecognizer!
  var capturePhotoOutput: AVCapturePhotoOutput! // NEW

  override func viewDidLoad() {
    super.viewDidLoad()
    setupCamera()
    setupTapRecognizer()
    setupPhotoOutput() // NEW
  }

  private func setupPhotoOutput() {
    capturePhotoOutput = AVCapturePhotoOutput()
    capturePhotoOutput.isHighResolutionCaptureEnabled = true
    captureSession.addOutput(capturePhotoOutput!)
  }
Next, we extend our ViewController with the methods necessary to take a photo
and be an AVCapturePhotoCaptureDelegate. Add the following block of code just
below the main ViewController class definition inside ViewController.swift:
extension ViewController : AVCapturePhotoCaptureDelegate {
  private func capturePhoto() {
    let photoSettings = AVCapturePhotoSettings()
    photoSettings.isAutoStillImageStabilizationEnabled = true
    photoSettings.isHighResolutionPhotoEnabled = true
    photoSettings.flashMode = .auto
    capturePhotoOutput?.capturePhoto(with: photoSettings, delegate: self)
  }

  func photoOutput(_ output: AVCapturePhotoOutput,
                   didFinishProcessingPhoto photo: AVCapturePhoto,
                   error: Error?) {
    guard error == nil else {
      fatalError("Failed to capture photo: \(String(describing: error))")
    }
    guard let imageData = photo.fileDataRepresentation() else {
      fatalError("Failed to convert pixel buffer")
    }
    guard let image = UIImage(data: imageData) else {
      fatalError("Failed to convert image data to UIImage")
    }
    print(image.size)
  }
}
Inside capturePhoto, we configure some settings for taking the picture, and
then set our AVCapturePhotoCaptureDelegate self as the delegate for calling
the AVCapturePhotoOutput class’ capturePhoto method. The effect of this is
that the photoOutput method we define right below will be called when a
picture is taken. After some error handling and tedious boilerplate, we end up
with a UIImage of whatever we captured at the time the user tapped the screen.
For now, we’ll just print the size to give us some sense of success. The
ultimate but most crucial step is then to replace our joyous "Tap!" message
with a call to capturePhoto in our ViewController’s handleTap method:
@objc func handleTap(sender: UITapGestureRecognizer) {
  if sender.state == .ended {
    capturePhoto()
  }
}
Rebuild, run, tap:

If all goes well, you should see the image dimensions in pixel units printed in the terminal.
Displaying a Captured Image
At this point, we have a way of getting a live preview of our camera as well as the ability to capture a photo. Sweet! The next step is to display this image in a new view controller. This view controller will have a button to return to the live preview as well as an activity indicator that spins while we await results from the Vision API. We will also draw the bounding box for each recognized segment of text.
Let’s begin by creating a new view controller in the interface builder:

and connect it to our main view controller via a Present Modally segue:
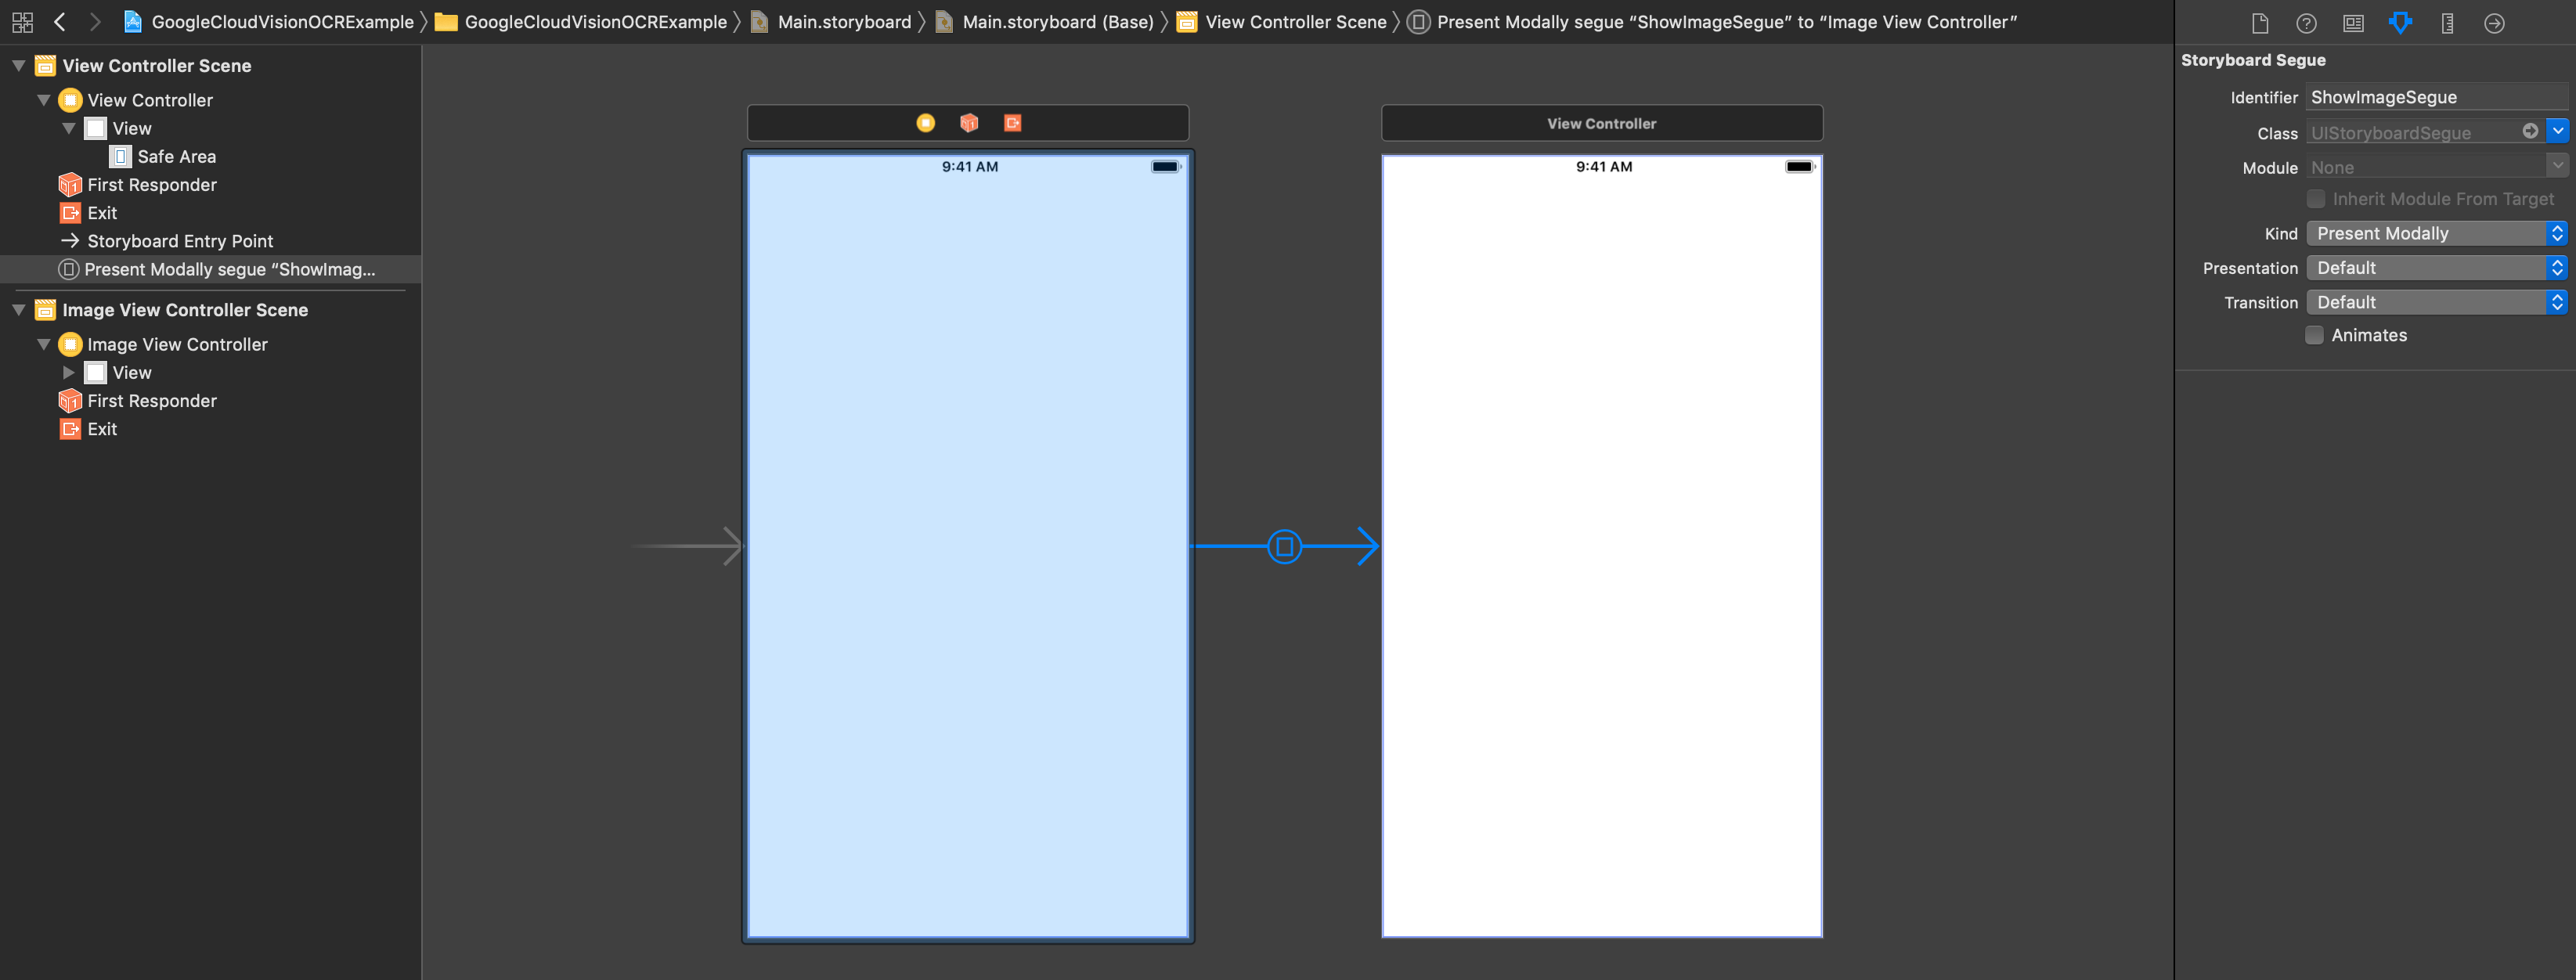
I gave the segue the identifier ShowImageSegue so we can refer to it with that name in our
implementation. I also disabled the Animated checkbox since this will make the impression that the
photo preview is being “frozen”, while the animation would fly the new view in from the edge of the
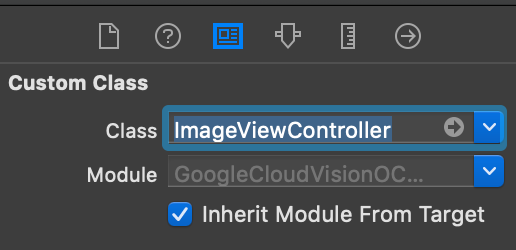
screen. Next, create an ImageViewController subclass of UIViewController in a new Cocoa
Touch file:
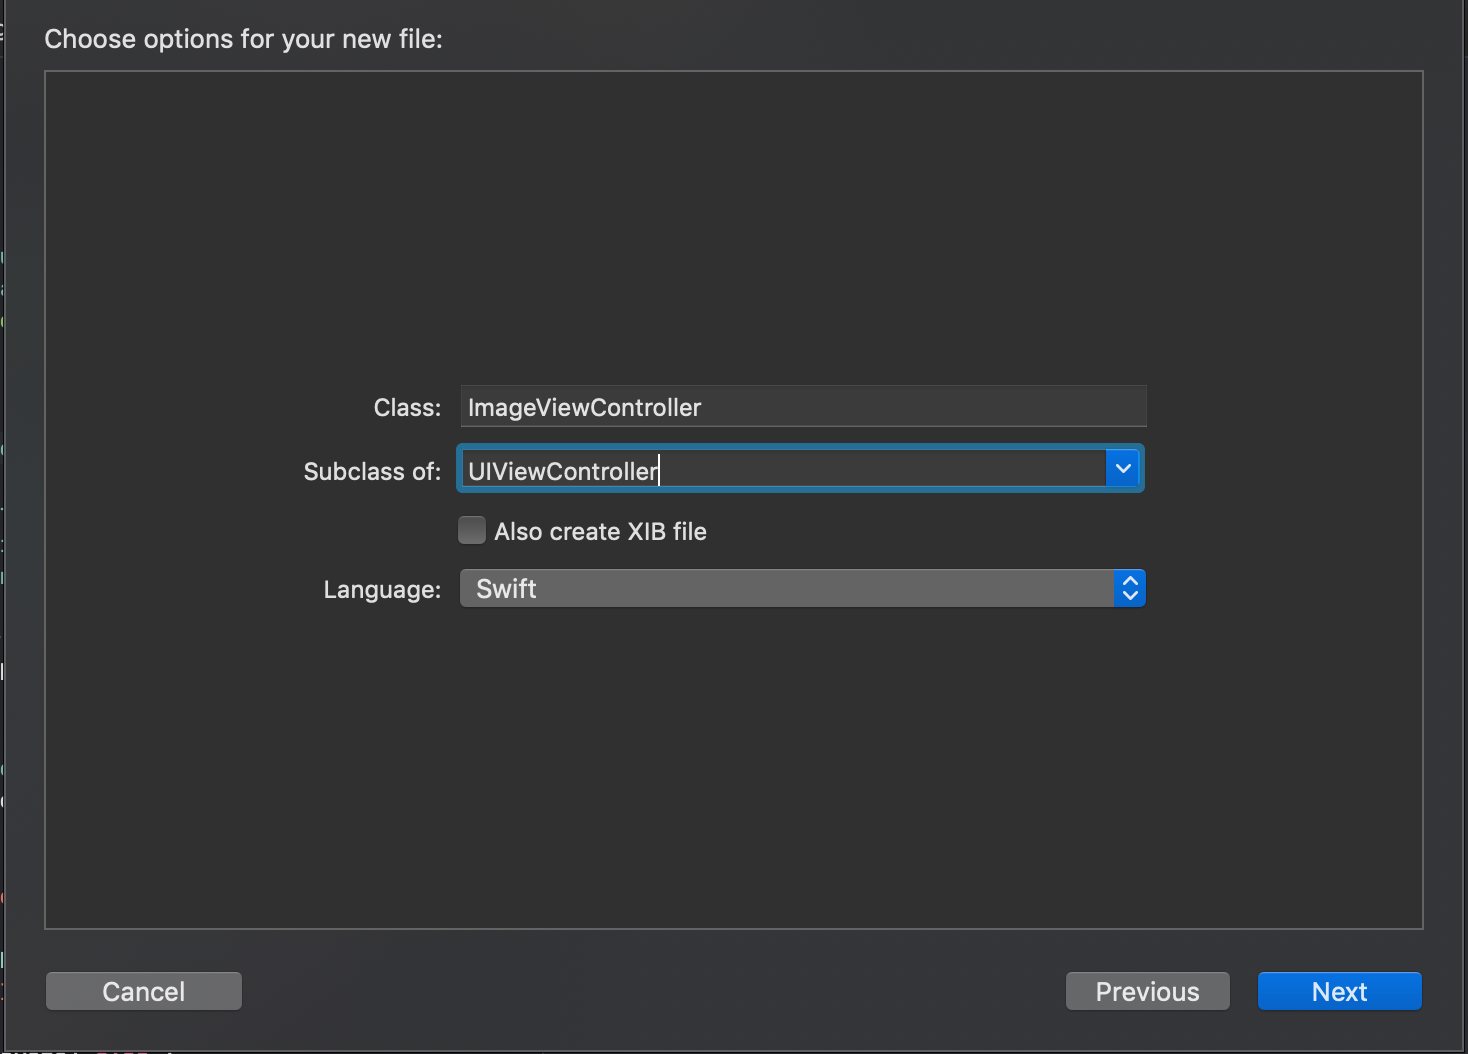
Also inherit the view controller from this new class in the interface builder:
Now that we have the basic visual infrastructure configured, let’s work on passing the captured
image to our new view controller, which will display the image and later on show the bounding boxes
too. For this, we’ll add a readyImage property to our main ViewController (the one we’ve been writing so far):
class ViewController: UIViewController {

  var captureSession: AVCaptureSession!
  var capturePhotoOutput: AVCapturePhotoOutput!
  var tapRecognizer: UITapGestureRecognizer!
  var readyImage: UIImage!                        // NEW
Next, let’s remove the print(image.size) line in photoOutput in favor of
some more useful code that performs a segue to the ImageViewController:
func photoOutput(_ output: AVCapturePhotoOutput,
                   didFinishProcessingPhoto photo: AVCapturePhoto,
                   error: Error?) {
  guard error == nil else {
    fatalError("Failed to capture photo: \(String(describing: error))")
  }
  guard let imageData = photo.fileDataRepresentation() else {
    fatalError("Failed to convert pixel buffer")
  }
  guard let image = UIImage(data: imageData) else {
    fatalError("Failed to convert image data to UIImage")
  }

  // NEW
  readyImage = image
  performSegue(withIdentifier: "ShowImageSegue", sender: self)
}
Notice that we pass "ShowImageSegue" as the identifier of the segue, as we
configured this in the InterfaceBuilder earlier. Once we initiate the segue, iOS
allows us to prepare for the transition to the new view controller in the aptly
named prepare() method. Inside, our task is to lay the groundwork for upcoming
view controller’s time to shine. For us this means passing it the image we just
captured. Unfortunately, there is to my knowledge no cleaner way to do this than
assigning to some field of the target controller:
override func prepare(for segue: UIStoryboardSegue, sender: Any?) {
  super.prepare(for: segue, sender: sender)
  if let imageViewController = segue.destination as? ImageViewController {
    imageViewController.image = readyImage
  }
}
At the moment, this code will not yet quite compile. The reason is that while we did create the
ImageViewController class, it’s still missing the image field we want to assign to here. Let’s
move on to implementing the ImageViewController and give it this field and further logic.
Implementing the ImageViewController
The minimal implementation of the ImageViewController is actually very succinct:
import UIKit

class ImageViewController: UIViewController {

  var image: UIImage!

  override func viewDidLoad() {
    super.viewDidLoad()
    let imageView = UIImageView(frame: view.frame)
    imageView.image = image
    view.addSubview(imageView)
  }
}
We create a UIImageView to hold the image, assign it the image that was set by
the main ViewController before the segue, and add the UIImageView as a
subview of the view controller’s view. With this, you can now reload the app
and if you tap on the screen, the screen should “freeze” and display the
captured image.
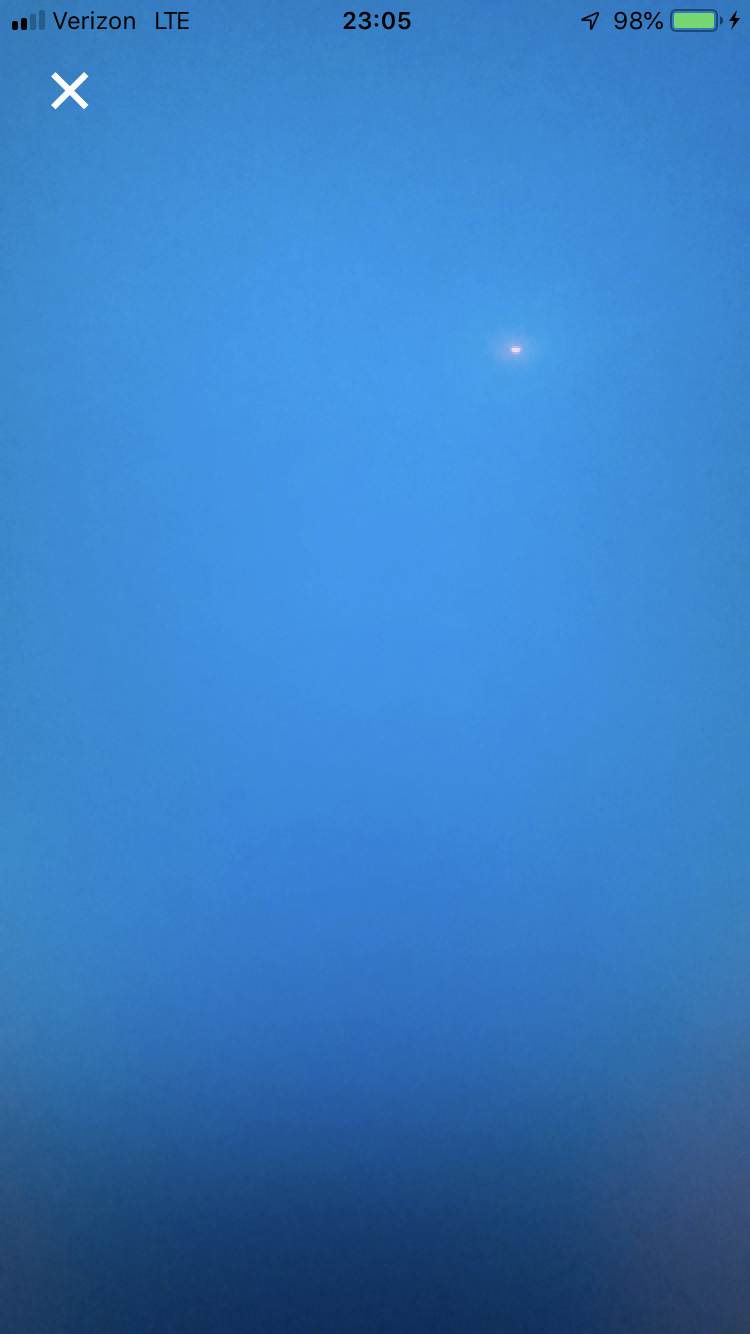
Adding a Close Button
Next, let’s add a button in the top left corner that allows closing the view and returning to our live preview so that we can take a new picture:
override func viewDidLoad() {
  super.viewDidLoad()

  let imageView = UIImageView(frame: view.frame)
  imageView.image = image
  view.addSubview(imageView)

  setupCloseButton() // NEW
}

private func setupCloseButton() {
  let closeButton = UIButton()
  view.addSubview(closeButton)

  // Stylistic features.
  closeButton.setTitle("✕", for: .normal)
  closeButton.setTitleColor(UIColor.white, for: .normal)
  closeButton.titleLabel?.font = UIFont.systemFont(ofSize: 32)

  // Add a target function when the button is tapped.
  closeButton.addTarget(self, action: #selector(closeAction), for: .touchDown)

  // Constrain the button to be positioned in the top left corner (with some offset).
  closeButton.translatesAutoresizingMaskIntoConstraints = false
  closeButton.leadingAnchor.constraint(equalTo: view.leadingAnchor, constant: 20).isActive = true
  closeButton.topAnchor.constraint(equalTo: view.topAnchor, constant: 20).isActive = true
}

@objc private func closeAction() {
  dismiss(animated: false, completion: nil)
}
In the setupCloseButton() method, we create a new UIButton, change its style
and appearance, then add a target function which will be called when the button
is tapped, and finally constrain the button to be located in the top left corner
of the base view. Note that the button text here is the
unicode multiplication symbol,
which a suprising number of apps out in the wild actually use for their close
buttons. Inside closeAction(), we simply call dismiss() to hide the current
view controller and bring back the main one. After re-running and tapping the
screen, the ImageViewController with the captured image should (structurally)
look like this, with the close button in the top left corner:
Tapping the close button should take you back to the original live preview screen, so that you can take a new picture, close it again, take another picture and close that one too! All day and night! Fun!
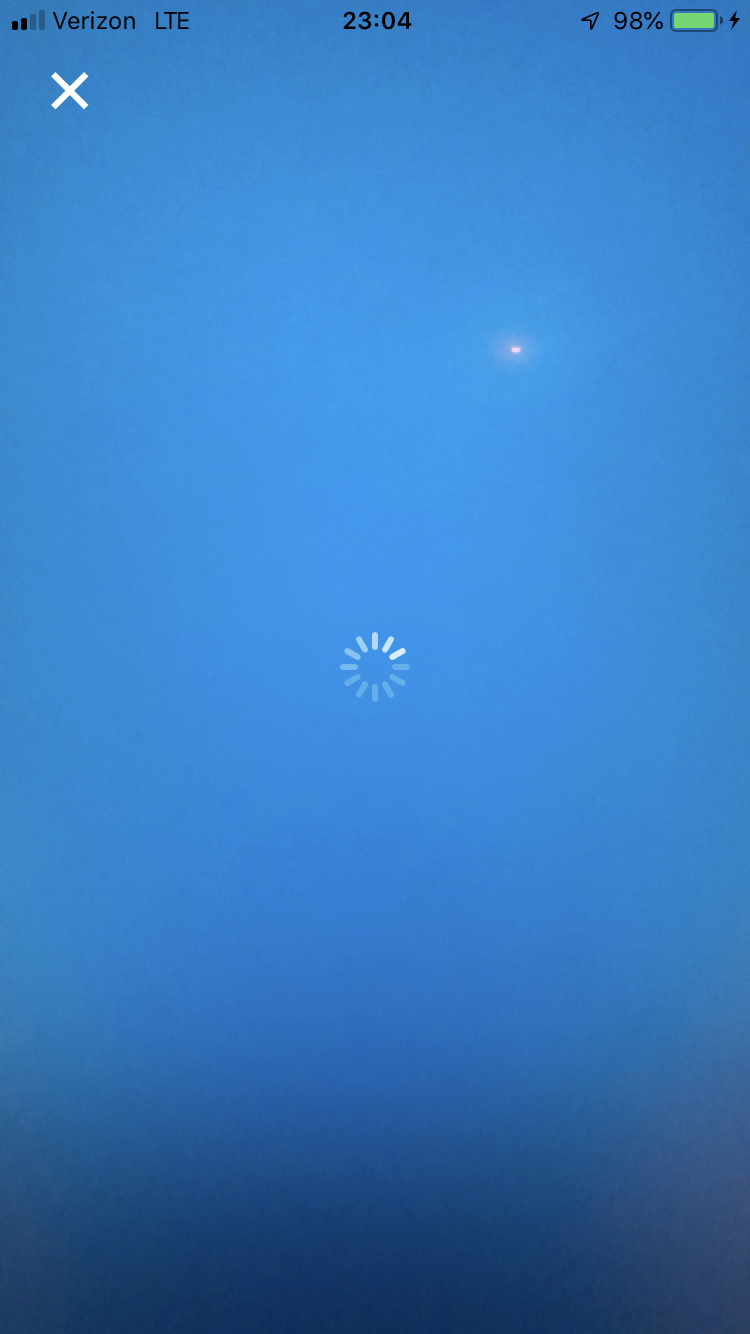
Adding an Activity Indicator
Before we get to the exciting part of fetching bounding boxes and displaying
them, let’s add one more nicety to our UI: an activity indicator that is visible
while our API request and its corresponding response are floating through the
internet. We’ll hide it as soon as we are ready to display bounding boxes. Add
the following changes to the ImageViewController:
class ImageViewController: UIViewController {

  var image: UIImage!
  var activityIndicator: UIActivityIndicatorView! // NEW

  override func viewDidLoad() {
    super.viewDidLoad()

    let imageView = UIImageView(frame: view.frame)
    imageView.image = image
    view.addSubview(imageView)

    setupCloseButton()
    setupActivityIndicator() // NEW
  }

  private func setupActivityIndicator() {
    activityIndicator = UIActivityIndicatorView(style: .whiteLarge)
    view.addSubview(activityIndicator)
    activityIndicator.translatesAutoresizingMaskIntoConstraints = false
    activityIndicator.centerXAnchor.constraint(equalTo: view.centerXAnchor).isActive = true
    activityIndicator.centerYAnchor.constraint(equalTo: view.centerYAnchor).isActive = true
    activityIndicator.startAnimating()
  }
We add a property for the activityIndicator – of type UIActivityIndicatorView – on our
ImageViewController because we’ll need to access it to stop its animation once the response
arrives. Beyond that, setupActivityIndicator() simply instantiates the indicator, centers it
within the base view and starts its animation (a spinning wheel). The live ImageViewController
should now look like this:
Making Requests to the Google Cloud Vision API from Swift
We now, finally, come to the part of our journey where we will make API calls to
the Google Cloud Vision API to perform OCR and detect text bounding boxes in the
image the user captured. To make the API call in a more convenient fashion than
is possible with Swift and iOS’ native HTTP request library, we will use Alamofire.
Alamofire makes writing HTTP requests short and concise. It is similar in spirit
to the popular requests package in
Python. I like to use CocoaPods for dependency
management. An alternative dependency management toolchain for iOS is Carthage,
which you are free to use of course. If you go with CocoaPods, start by running
pod init in your project folder. Your Podfile should then look like this:
platform :ios, '10.0'

target 'GoogleCloudVisionOCRExample' do
  use_frameworks!
  pod 'Alamofire', '~> 4.7'
end
You have to close the XCode project you have open and then run pod install
from the command line:
$ pod install
Analyzing dependencies
Downloading dependencies
Using Alamofire (4.7.3)
Generating Pods project
Integrating client project
Sending stats
Pod installation complete! There is 1 dependency from the Podfile and 1 total pod installed.
Finally, re-open the GoogleCloudVisionOCRExample.xcworkspace CocoaPods
generated for us. We’re now all set to use Alamofire in our project to make
API calls to Google Cloud. For the actual request and response handling, let’s
create two new files in our project: GoogleCloudOCR.swift for the request
logic and GoogleCloudOCRModel.swift to define a set of structs into which
we’ll decode the JSON response from the API (i.e. the object relational mapping,
or ORM). Let’s begin by implementing a first version of the request logic in
GoogleCloudOCR.swift:
import Foundation
import Alamofire

class GoogleCloudOCR {
  private let apiKey = "<YOUR API KEY>"
  private var apiURL: URL {
    return URL(string: "https://vision.googleapis.com/v1/images:annotate?key=\(apiKey)")!
  }

  func detect(from image: UIImage, completion: @escaping (OCRResult?) -> Void) {
    guard let base64Image = base64EncodeImage(image) else {
      print("Error while base64 encoding image")
      completion(nil)
      return
    }
    callGoogleVisionAPI(with: base64Image, completion: completion)
  }

  private func callGoogleVisionAPI(
    with base64EncodedImage: String,
    completion: @escaping (OCRResult?) -> Void) {
    let parameters: Parameters = [
      "requests": [
        [
          "image": [
            "content": base64EncodedImage
          ],
          "features": [
            [
              "type": "TEXT_DETECTION"
            ]
          ]
        ]
      ]
    ]
    let headers: HTTPHeaders = [
      "X-Ios-Bundle-Identifier": Bundle.main.bundleIdentifier ?? "",
      ]
    Alamofire.request(
      apiURL,
      method: .post,
      parameters: parameters,
      encoding: JSONEncoding.default,
      headers: headers)
      .responseJSON { response in
        if response.result.isFailure {
          completion(nil)
          return
        }
        print(response.result.debugDescription)
    }
  }

  private func base64EncodeImage(_ image: UIImage) -> String? {
    return image.pngData()?.base64EncodedString(options: .endLineWithCarriageReturn)
  }
}
This GoogleCloudOCR class exposes only a single method, detect(), which takes an image and a
completion handler which is called once we get a successful response for our API call. This
detect() method then does two things: first, it base64 encodes the image so we can send it over
the wire as a character string; second, it makes the request to Google Cloud in
callGoogleVisionAPI. The parameters dictionary in callGoogleVisionAPI describes the API
request in the same way as we did from the command line at the start of this article. The
X-Ios-Bundle-Identifier header is a security measure that identifies the request source as our
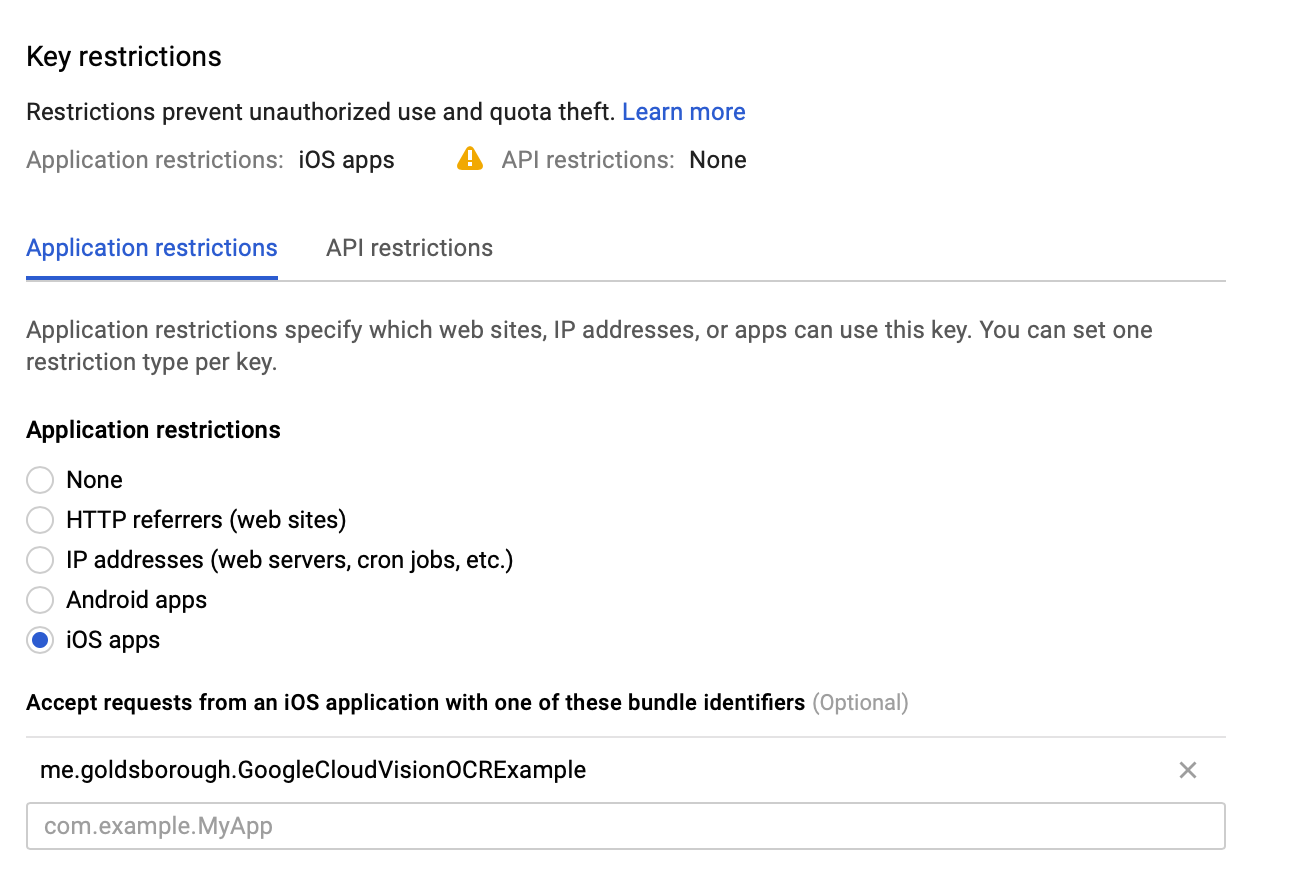
application. This is not required, but certainly a very sound thing to do. To enable this access
restriction, go to your Google Cloud console and then to the Credentials section under APIs &
Services. It’ll look something like this, with
me.goldsborough.GoogleCloudVisionOCRExample replaced with your app’s bundle identifier:
We then use Alamofire.request to make the actual API call. In the completion handler, we do some
rudimentary error handling and then print the result. The latter is simply to arrive at a temporary
checkpoint before we look into actually processing the response in the next few paragraphs. Also,
before we continue, be sure to replace the <YOUR API KEY> string in the code with your actual API
key from Google Cloud. Let’s continue by wiring up this GoogleCloudOCR class we built with our
ImageViewController. Update the ImageViewController as follows:
override func viewDidLoad() {
  super.viewDidLoad()

  let imageView = UIImageView(frame: view.frame)
  imageView.image = image
  view.addSubview(imageView)

  setupCloseButton()
  setupActivityIndicator()

  detectBoundingBoxes(for: image) // NEW
}

private func detectBoundingBoxes(for image: UIImage) {
  GoogleCloudOCR().detect(from: image) { ocrResult in
    self.activityIndicator.stopAnimating()
    guard let ocrResult = ocrResult else {
      fatalError("Did not recognize any text in this image")
    }
    print(ocrResult)
  }
}
Inside detectBoundingBoxes(), we call the detect() method on a fresh
GoogleCloudOCR instance and give it a completion handler which, for the
moment, will simply print whatever result we funnel into it (we’ll tie together
all these loose ends soon, I promise). Later on, this is where we’ll hand the
ocrResult off to the routine that manages displaying the bounding boxes.
There is one last step required before we can succesfully run this application. If you run it as is, take a picture of something and wait for a response, it will not only be very slow, but also complete with an unsuccessful response:
SUCCESS: {
    error =     {
        code = 400;
        message = "Request payload size exceeds the limit: 10485760 bytes.";
        status = "INVALID_ARGUMENT";
    };
}
As you can see, the response succesfully error’d … or erroneously succeeded?
Besides making a slightly schizophrenic impression, this response is telling us
that the image payload we sent it was larger than the maximum allowed size of
1MB. An easy way to resolve this, which will incidentally make displaying the
bounding boxes later on much easier too, is to resize the image to the size of
the screen. That will definitely make the image small enough (on current phones)
and also make the image fit the screen exactly. For this, let’s update the
ImageViewController a little bit:
override func viewDidLoad() {
  super.viewDidLoad()

  // NEW: Resize the image to the screen size
  guard let resizedImage = resize(image: image, to: view.frame.size) else {
    fatalError("Error resizing image")
  }

  let imageView = UIImageView(frame: view.frame)
  imageView.image = resizedImage // Use the resized image here
  view.addSubview(imageView)

  setupCloseButton()
  setupActivityIndicator()

  detectBoundingBoxes(for: resizedImage) // And use the resized image here
}

private func resize(image: UIImage, to targetSize: CGSize) -> UIImage? {
  let size = image.size

  let widthRatio  = targetSize.width  / size.width
  let heightRatio = targetSize.height / size.height

  // Figure out what our orientation is, and use that to form the rectangle.
  var newSize: CGSize
  if(widthRatio > heightRatio) {
    newSize = CGSize(width: size.width * heightRatio, height: size.height * heightRatio)
  } else {
    newSize = CGSize(width: size.width * widthRatio,  height: size.height * widthRatio)
  }

  let rect = CGRect(x: 0, y: 0, width: newSize.width, height: newSize.height + 1)

  UIGraphicsBeginImageContextWithOptions(newSize, false, 1.0)
  image.draw(in: rect)
  let newImage = UIGraphicsGetImageFromCurrentImageContext()
  UIGraphicsEndImageContext()

  return newImage
}
Re-running the application now should make the request succeed with a legitimately succesful response. Pointing the camera at something with text and snapping a picture should give a response that looks something like the following (with different numbers):
SUCCESS: {
    responses =     (
                {
            fullTextAnnotation =             {
                pages =                 (
                                        {
                        blocks =                         (
                                                        {
                                blockType = TEXT;
                                boundingBox =                                 {
                                    vertices =                                     (
                                                                                {
                                            x = 119;
                                            y = 223;
                                        },
                                                                                {
                                            x = 268;
                                            y = 223;
                                        },
                                                                                {
                                            x = 268;
                                            y = 317;
                                        },
This is a pretty exciting step. We now have the raw data we want to display in our application – the model. The only thing left to do now is post-process and visualize this data. The first thing we want to do is transform the raw JSON response into a structured representation of Swift objects that we can manipulate better in code. Swift actually comes with a very powerful deserialization API that we can make use of here. We simply need to define a set of nesting Swift structs, implement a single decoding method per struct that tells Swift’s decoder how to convert a particular field in the response data to the corresponding field in the struct, and then finally pipe Google Cloud’s response through this tree of deserialization routines to decode it into a Swift object. While this is quite neat to work with, it’s also not the most exciting code you’ll ever write, so I’ll just paste it here in one go:
import Foundation
import UIKit

struct Vertex: Codable {
  let x: Int?
  let y: Int?
  enum CodingKeys: String, CodingKey {
    case x = "x", y = "y"
  }
  init(from decoder: Decoder) throws {
    let container = try decoder.container(keyedBy: CodingKeys.self)
    x = try container.decodeIfPresent(Int.self, forKey: .x)
    y = try container.decodeIfPresent(Int.self, forKey: .y)
  }

  func toCGPoint() -> CGPoint {
    return CGPoint(x: x ?? 0, y: y ?? 0)
  }
}

struct BoundingBox: Codable {
  let vertices: [Vertex]
  enum CodingKeys: String, CodingKey {
    case vertices = "vertices"
  }
  init(from decoder: Decoder) throws {
    let container = try decoder.container(keyedBy: CodingKeys.self)
    vertices = try container.decode([Vertex].self, forKey: .vertices)
  }
}

struct Annotation: Codable {
  let text: String
  let boundingBox: BoundingBox
  enum CodingKeys: String, CodingKey {
    case text = "description"
    case boundingBox = "boundingPoly"
  }
  init(from decoder: Decoder) throws {
    let container = try decoder.container(keyedBy: CodingKeys.self)
    text = try container.decode(String.self, forKey: .text)
    boundingBox = try container.decode(BoundingBox.self, forKey: .boundingBox)
  }
}

struct OCRResult: Codable {
  let annotations: [Annotation]
  enum CodingKeys: String, CodingKey {
    case annotations = "textAnnotations"
  }
  init(from decoder: Decoder) throws {
    let container = try decoder.container(keyedBy: CodingKeys.self)
    annotations = try container.decode([Annotation].self, forKey: .annotations)
  }
}

struct GoogleCloudOCRResponse: Codable {
  let responses: [OCRResult]
  enum CodingKeys: String, CodingKey {
    case responses = "responses"
  }
  init(from decoder: Decoder) throws {
    let container = try decoder.container(keyedBy: CodingKeys.self)
    responses = try container.decode([OCRResult].self, forKey: .responses)
  }
}
This code should go into a new Swift file called GoogleCloudOCRModel.swift.
Let’s now use this structured representation. In GoogleCloudOCR.swift, we
previously called responseJSON() on the Alamofire request object to get the
response in JSON format. Instead, we’ll now want to access the raw data coming
off the wire via responseData() and decode it into a GoogleCloudOCRResponse
object. Update the Alamofire request in the callGoogleVisionAPI() method to
look like this:
Alamofire.request(
  apiURL,
  method: .post,
  parameters: parameters,
  encoding: JSONEncoding.default,
  headers: headers)
  .responseData { response in // .responseData instead of .responseJSON
    if response.result.isFailure {
      completion(nil)
      return
    }
    guard let data = response.result.value else {
      completion(nil)
      return
    }
    // Decode the JSON data into a `GoogleCloudOCRResponse` object.
    let ocrResponse = try? JSONDecoder().decode(GoogleCloudOCRResponse.self, from: data)
    completion(ocrResponse?.responses[0])
}
Notice that we call the completion handler with ocrResponse?.responses[0]. This is because we
expect the outermost responses array to only contain a single element in our case, since we only
make a single request per captured image. We can now easily print the number of annotations for our
image, back in ImageViewController.swift:
private func detectBoundingBoxes(for image: UIImage) {
  GoogleCloudOCR().detect(from: image) { ocrResult in
    self.activityIndicator.stopAnimating()
    guard let ocrResult = ocrResult else {
      fatalError("Did not recognize any text in this image")
    }
    print("Found \(ocrResult.annotations.count) bounding box annotations in the image!")
  }
}
Re-running the application and snapping a picture with text in it should now hopefully print something like:
Found 38 bounding box annotations in the image!
We’re now all set for the final challenge on our journey: displaying the bounding boxes in the image. Onwards!
Displaying Bounding Boxes on the Captured Image
We can split the final step of displaying the bounding boxes into two separate tasks. First, let’s figure out how to simply draw the bounding box on the screen, without any interactivity. Then, because displaying the bounding box alone is not really that useful from a user interface perspective, we’ll make each bounding box into a button that the user can tap. This will allow our application to perform some action based on the text inside the bounding box that was tapped.
Let’s start with the first (easier) task of just displaying the bounding box.
Begin with the following updates to ImageViewController.swift:
private func detectBoundingBoxes(for image: UIImage) {
  GoogleCloudOCR().detect(from: image) { ocrResult in
    self.activityIndicator.stopAnimating()
    guard let ocrResult = ocrResult else {
      fatalError("Did not recognize any text in this image")
    }
    self.displayBoundingBoxes(for: ocrResult) // NEW
  }
}

private func displayBoundingBoxes(for ocrResult: OCRResult) {
  for annotation in ocrResult.annotations[1...] {
    let path = createBoundingBoxPath(along: annotation.boundingBox.vertices)
    let shape = shapeForBoundingBox(path: path)
    view.layer.addSublayer(shape)
  }
}
In the above code, we replaced the print() statement with a call to
displayBoundingBoxes(). In the implementation of that method we iterate
through every annotation (bounding box) and do two things: first, create a
UIBezierPath that goes through the vertices by which that particular
annotation is defined and second, make that path the border of a CAShape which
we can further style to our liking. This CAShape is then added on top of the
main view. The two outstanding methods look like this:
private func createBoundingBoxPath(along vertices: [Vertex]) -> UIBezierPath {
  let path = UIBezierPath()
  path.move(to: vertices[0].toCGPoint())
  for vertex in vertices[1...] {
    path.addLine(to: vertex.toCGPoint())
  }
  path.close()
  return path
}

private func shapeForBoundingBox(path: UIBezierPath) -> CAShapeLayer {
  let shape = CAShapeLayer()
  shape.lineWidth = 1.5
  shape.strokeColor = UIColor.blue.cgColor
  shape.fillColor = UIColor.blue.withAlphaComponent(0.1).cgColor
  shape.path = path.cgPath
  return shape
}
You can change the line width, color and other visual properties inside
shapeForBoundingBox if you like. With the above code, however, we can already
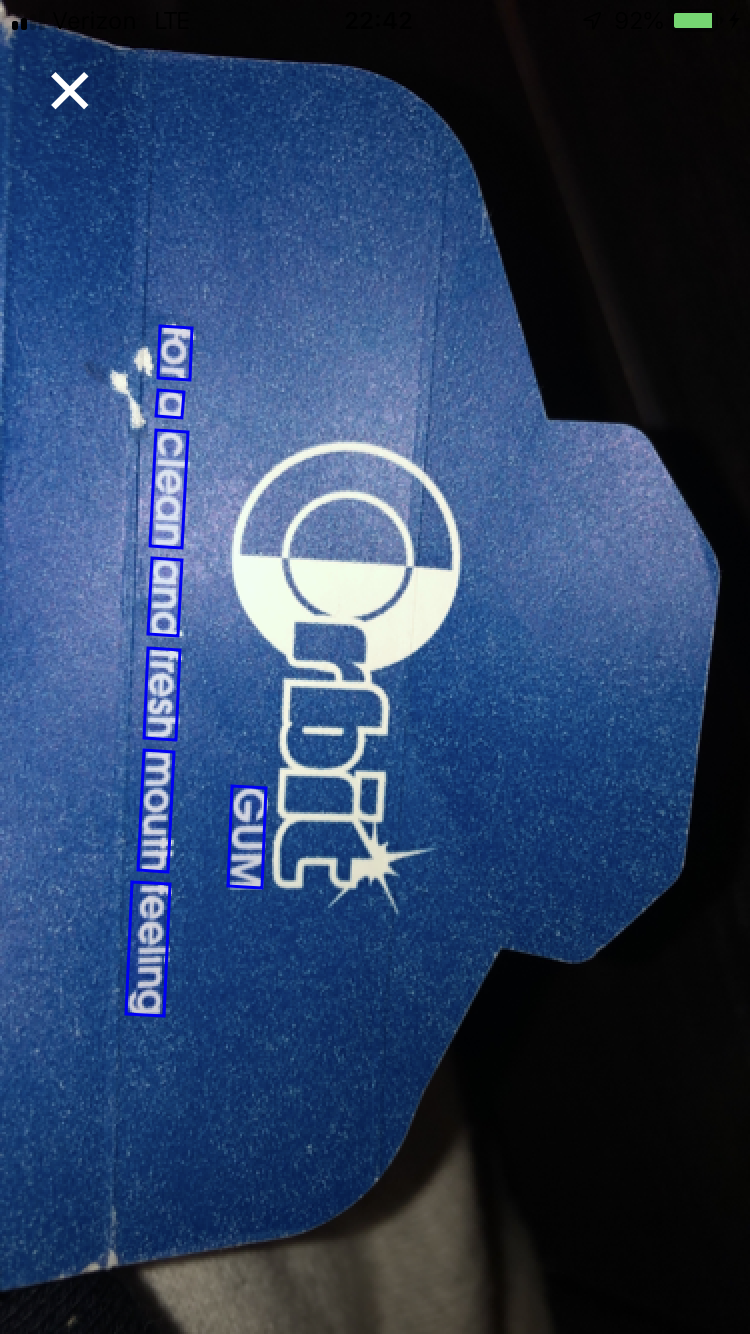
display exciting results like the following:
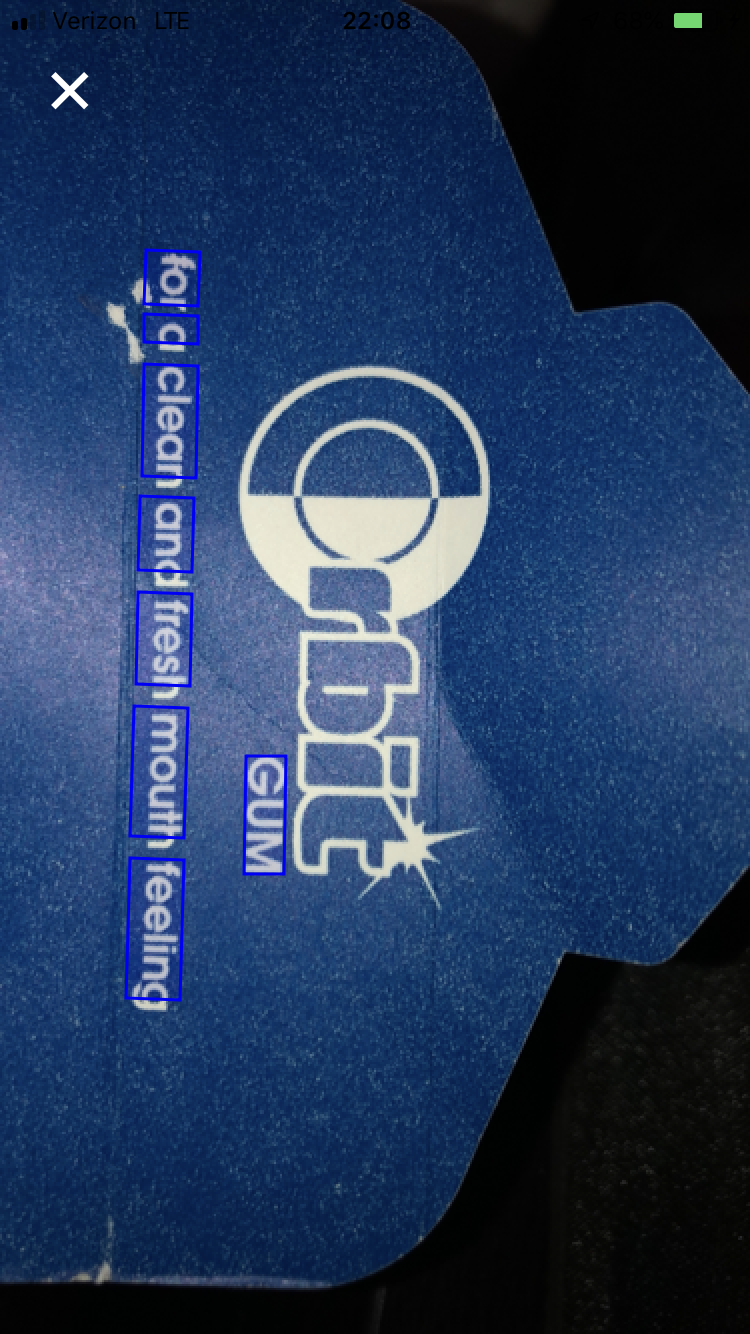
As you can see, the Vision API detected the bottom text and the word “gum”, but not the word “Orbit – that one is probably too stylized. Pretty cool! But does it scale? Let’s try more text:
Looks like it does!
Making the Bounding Boxes Interactive
Let’s now make these bounding boxes more interactive. What we want is a subclass
of UIButton that we can give the shape and look of a bounding box. This is
actually a little difficult because a UIButton can only have a rectangular
frame. This means we’ll have to manually detect when the user really touched
down inside the bounding box shape and not the surrounding rectangle the
UIButton actually lives in. Other than that, the implementation of this
BoundingBoxButton is fairly straightforward:
import UIKit

class BoundingBoxButton: UIButton {

  let text: String
  let path: UIBezierPath

  required init(path: UIBezierPath, text: String) {
    self.text = text
    self.path = path
    super.init(frame: path.bounds)
    path.apply(originTranslation(of: path, to: path.bounds.origin))
    addTarget(self, action: #selector(touchDown), for: .touchDown)
  }

  required init?(coder aDecoder: NSCoder) {
    fatalError("init(coder:) has not been implemented")
  }

  override func draw(_ rect: CGRect) {
    let shape = CAShapeLayer()
    shape.lineWidth = 1.5
    shape.strokeColor = UIColor.blue.cgColor
    shape.fillColor = UIColor.blue.withAlphaComponent(0.1).cgColor
    shape.path = self.path.cgPath
    layer.addSublayer(shape)
  }

  @objc func touchDown(button: BoundingBoxButton, event: UIEvent) {
    if let touch = event.touches(for: button)?.first {
      let location = touch.location(in: button)
      if self.path.contains(location) == false {
        button.cancelTracking(with: nil)
      }
    }
  }

  private func originTranslation(of: UIBezierPath, to: CGPoint) -> CGAffineTransform {
    return CGAffineTransform(a: 1, b: 0, c: 0, d: 1, tx: 0, ty: 0)
      .translatedBy(x: -frame.origin.x,
                    y: -frame.origin.y)
  }
}
Let’s discuss this code, which should go into a new file called
BoundingBoxButton.swift. We give our BoundingBoxButton a custom constructor,
which takes the path of the annotation and the text it represents. Both of these
pieces of information come from the backing model in our
GoogleCloudOCRResponse object. The custom constructor calls the
init(frame: CGRect) constructor which the UIButton has by default, in order
to create the surrounding frame in which the button will live. As I mentioned,
UIButtons – in fact UIViews in general – can only have rectangular frames.
Therefore, we need to supply such a rectangular frame, which we get very
conveniently via path.bounds, which spans a rectangle the UIBezierPath, no
matter how windy and complex, will fit into. We then apply a CGAffineTransform
to the path. This is because we created the path relative to the original image
frame, but now want to place it within the frame of the button, which may have a
different origin.
We also add a target function for the .touchDown event. The connected
function, here also called touchDown, takes care of determining when the user
actually clicked inside the bounding box’s path, as opposed to the surrounding
space of the button’s frame. In the latter case, we cancelTracking.
Lastly, draw() is exactly the code we had in shapeForBoundingBox earlier,
just that we directly add this shape to the BoundingBoxButton.
And that’s it for the implementation of the BoundingBoxButton. Next, let’s
create one such buttton for every annotation inside of our
displayBoundingBoxes() method in ImageViewController.swift. It should be
updated to look like this:
private func displayBoundingBoxes(for ocrResult: OCRResult) {
  for annotation in ocrResult.annotations[1...] {
    let path = createBoundingBoxPath(along: annotation.boundingBox.vertices)
    // Create a BoundingBoxButton for this path and the text inside the bounding box.
    let button = BoundingBoxButton(path: path, text: annotation.text)
    button.addTarget(self, action: #selector(boundingBoxTapped), for: .touchUpInside)
    self.view.addSubview(button)
  }
}

@objc private func boundingBoxTapped(sender: BoundingBoxButton) {
  let alert = UIAlertController(title: sender.text, message: "", preferredStyle: .alert)
  alert.addAction(UIAlertAction(
    title: NSLocalizedString("Yey", comment: "Default action"),
    style: .default,
    handler: nil))
  self.present(alert, animated: true, completion: nil)
}
This will add one BoundingBoxButton per annotation to the screen. When tapped,
we should see the contained text in a message box. Let’s try it out! First we
take a snap:
Then tap the bounding box containing the word “fresh” …
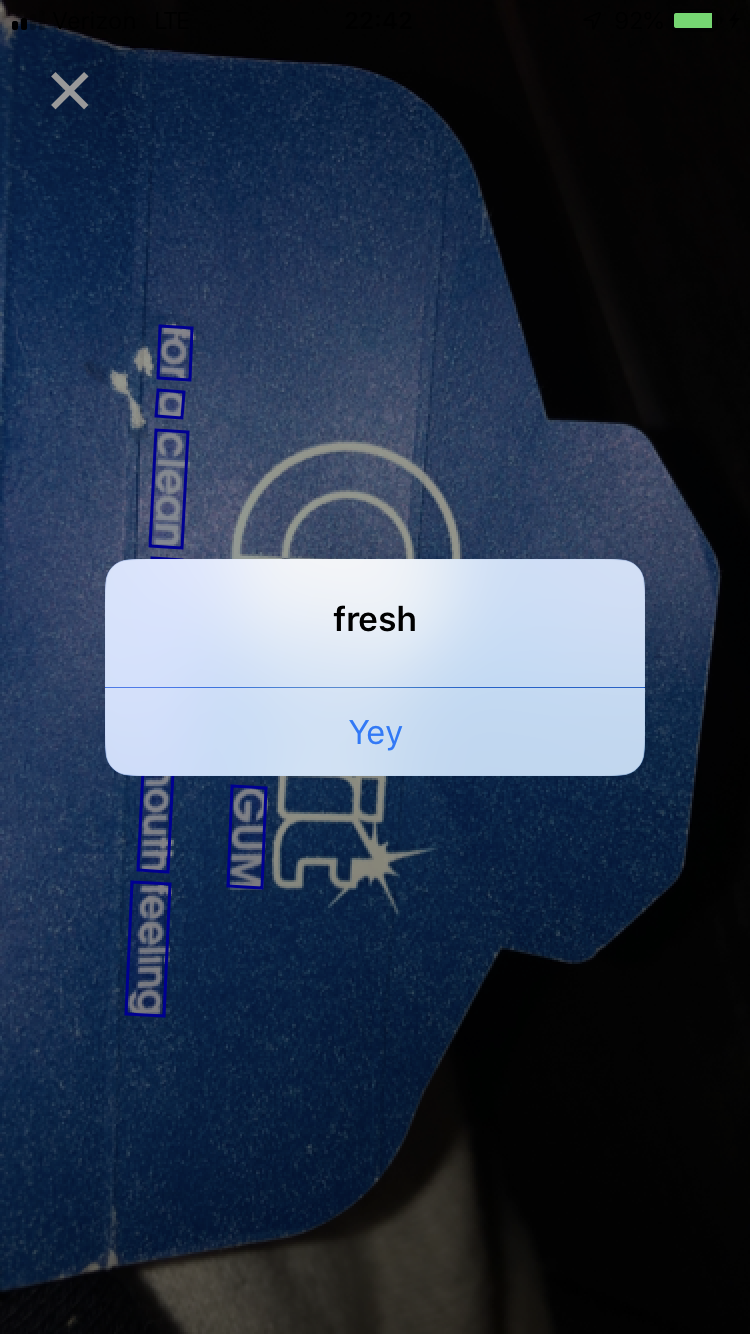
Yey! That worked, and also concludes the implementation of our innovative, breathtaking, ready-to-be-award-winning app.
Outro
In the beginning of this post we set out to use the Google Cloud Vision API – which provides access to world class machine learning algorithms – and build a tiny sample application with it. We first looked at talking to this API purely from the command line and then in the context of a more beefy iOS application written in Swift. I hope you learned a thing or two! More importantly, however, I hope this sample application gives you food for thought on many real world problems you can solve using this or other APIs, or maybe even by training your own machine learning models (with PyTorch, of course).
Personally, I found it exciting how quickly I could go from an idea that required the use of machine learning to having a minimal prototype up and running and working sufficiently well to prove or disprove the idea’s feasibility. The tools to solve the world’s hard problems, if they’re solvable with AI, are certainly there. Time to make use of them.
P.S.: The full code for the Swift app we built here can be found in this repository.